Magic: the Gathering Life Tracker
This project was originally posted on the Glowforge community forums. The whole thread is a good read for various improvements and remixes that other folks have made.
Introduction
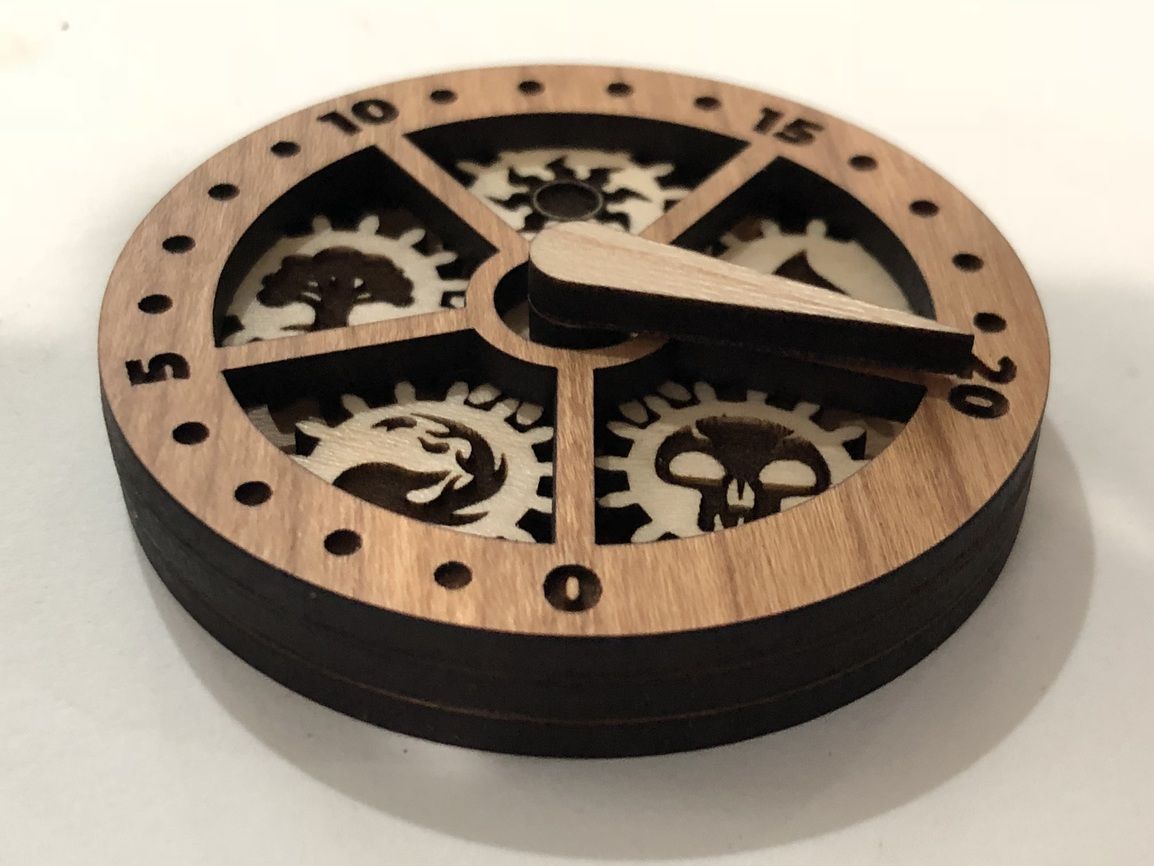
I made a counter to track life points in Magic: the Gathering from 20 down to 0. The design uses planetary gears, which are pretty neat because they rotate without needing an axle.

Watch a Video of it in Action
SVG File for Cutting
If you’d like to make this yourself, you can download the SVG file. The file has the gears and numbers and everything, but I left out the mana symbols because copyright. You can pretty easily find vector versions of those, however, and just stick them in before cutting.
How it was Designed
I used this planetary gear simulator to calculate the teeth, with additional help from this guide to planetary gear calculations.
I built everything with Inkscape’s “Render > Gear” extension. I follow this video tutoral for instructions on inverting the outer gear.
The inner gears I also gave a 0.1mm stroke, then used “Stroke to Path” and took the inner paths to make them a little smaller. Kerf by itself was not enough to allow free motion.
License and Reproduction
The SVG for the mechanism design is licensed under a Creative Commons Attribution-ShareAlike 4.0 International license.
As far as the spirit of the license, which is what really matters, if you’re making these to sell just put a “based on a design by Fiona Hopkins — http://bit.ly/MtgGears — CC BY-SA 4.0” on any label or something where you would also have your own name as credit. (That URL just links back to this page.)
You don’t have to put attribution on the objects themselves.
If you do make any modifications to the mechanism (folks here have done great things improving the axle) and distribute those beyond personal use, you’ll need to make the SVGs available and have them under the same CC BY-SA 4.0 license (that’s the “Share Alike”) bit.
You don’t need to share SVGs of custom art for the gears or the back, though. Just the mechanism itself.
Assembly Instructions
Here’s a breakdown that I hope folks will be able to follow. I did this just in draftboard for the pictures, but the ones I made above are in Proofgrade plywood.
I used Krazy Glue to affix everything together. You could probably use a slower-drying glue especially for the rings and top piece, so you’ll be able to more easily line them up flush, but you will need something strong for the pointer assembly because it’s dealing with some lever-enhanced rotational force.
For starters, cut everything out. The six gears are exactly the same, so pick any five to be the “planets” to engrave on. You can also engrave on the big circle, then flip it over so that you have a logo or something on the back.
Note that the faces of the ring gear are completely covered in the final product, and the edges are burned, so if you’re doing this in two tones like my pictures it’s fine if it’s the same color as the gears, rather than whatever color you’re using for the top and back. (This is the way the file is laid out, with four gears inside the ring already.)
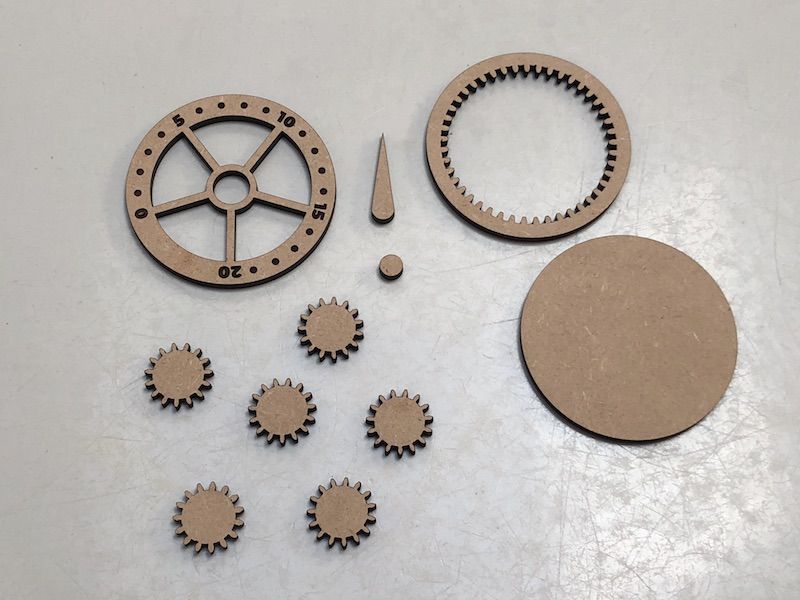
Step 1: Lay things out in an organized manner
The next step is to glue the ring gear on to the backing piece, and glue the tiny circle on to the center of the middle, “sun” gear.
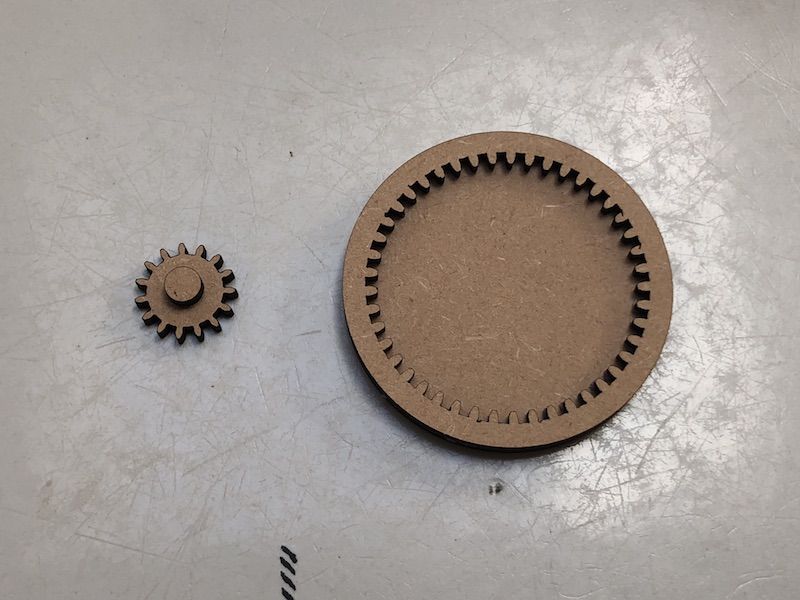
Step 2: Glue ring and pointer shim
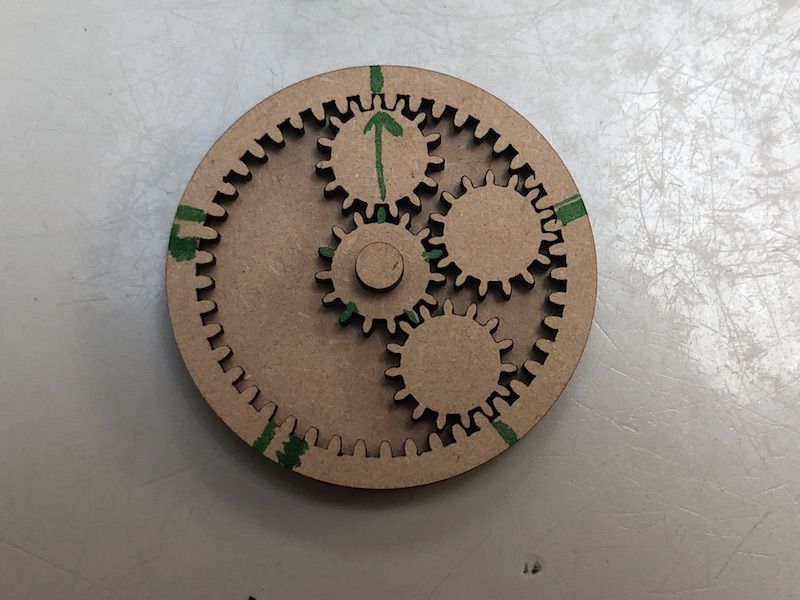
Now, fitting the gears together. The small gears each have 15 teeth, and the outer ring has 45 (this is the 2 * P + S calculation from the planetary gears formula 9). That means that everything nicely divides by five (the number of planets) so as you spin it the planets will rotate in sync with one another and line up every so often.
You’ll notice that the gears have a gap directly opposite a tooth. I try to imagine this as an arrow pointing from a tooth on the sun to the gap directly opposite on the ring. Because 15 / 5 is 3, you’ll be placing the planets around every third tooth of the sun, fitting into every 45 / 5 = 9th gap in the ring.
I’m just realizing now that, since the ring faces will be hidden, you can actually use a marker and draw right on top of it, which should make the assembly much easier. Just mark every 9th gap. I put mine together by eyeballing it which, as you can see from my markers, takes a bit of trial and error. (Don’t draw on the center gear, which will be visible, but it’s pretty easy to just see “every third tooth.”)
If you’ve engraved the back and want the design to line up with the front when you flip it over, make sure that your ring marks line up at this point.
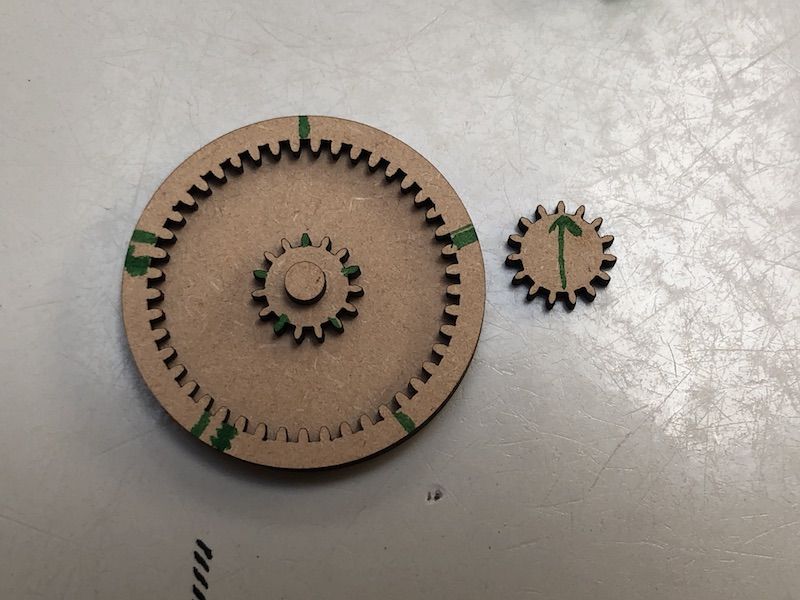
Step 3: Mark on the outside ring where gears need to point
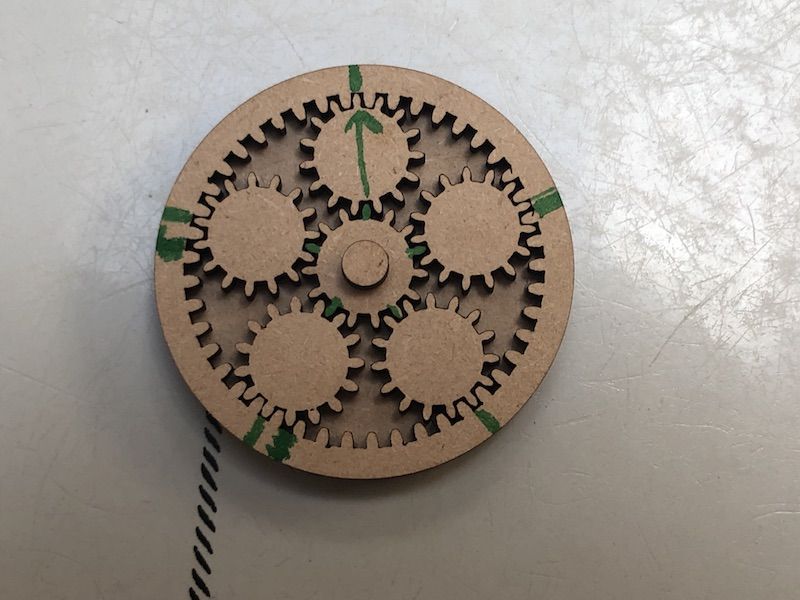
Next, start putting the planets in, taking care to make sure the engravings are the right way up. Keep imagining the arrows going from the sun to the ring.
Step 4: Place gears
Step 5: Place more gears
Now, gently turn the center gear back and forth, starting small, until it starts rotating smoothly. Check and make sure that it rotates all the way around, and then spin it until the planet engravings are back at their starting locations.
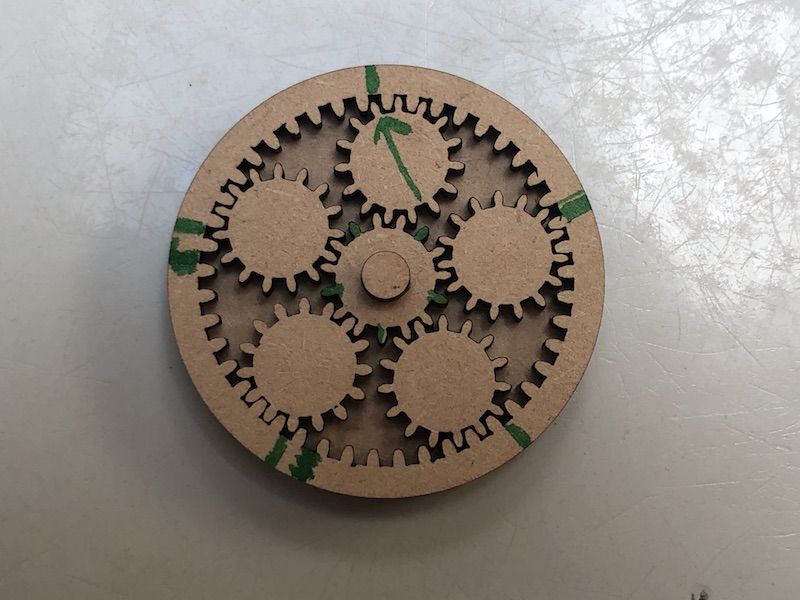
Step 6: Gently move the gears around until they spin freely
To put the top piece on, put the glue on the ring gear. If you put the glue on the top piece, you’ll risk gluing the gears in place (since it overhangs them to keep them in).
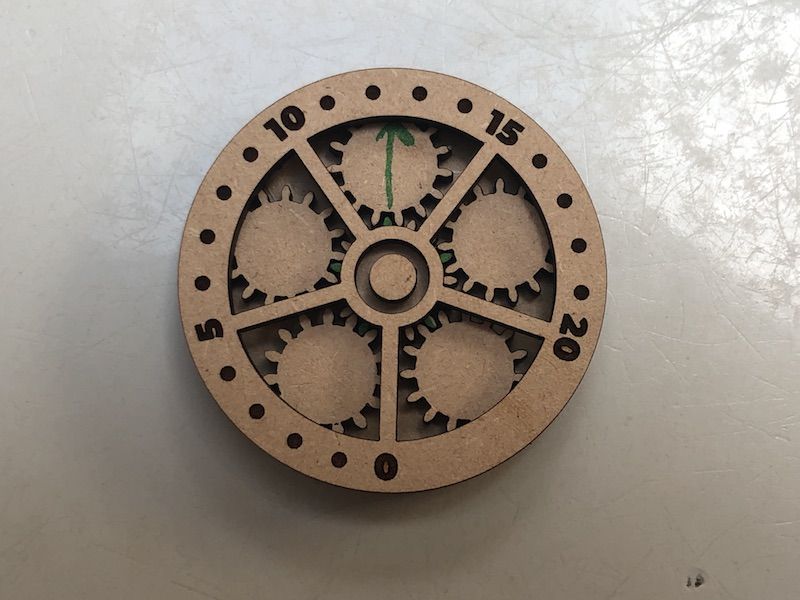
Step 7: Glue the top on in the right orientation
After that, just glue the pointer to its starting location.
Step 8: Glue the pointer pointing at the 20
Once everything dries, it should spin around! It will likely be stiff at first but then loosen up.